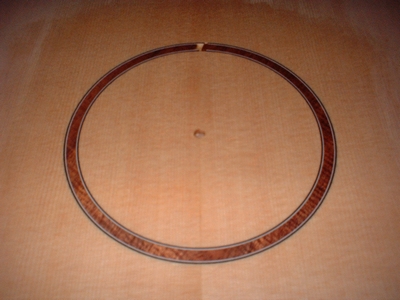
Thanks for the advice guys it helped a lot.
Went quicker and smoother than I expected and I'm pleased with the result.
(I apologise for the bad picture quality believe me it looks OK !)
| Official Luthiers Forum! http://www-.luthiersforum.com/forum/ |
|
| Fitting an LMI solid wood rosette http://www-.luthiersforum.com/forum/viewtopic.php?f=10102&t=9841 |
Page 1 of 1 |
| Author: | Richard_N [ Fri Dec 15, 2006 3:39 am ] |
| Post subject: | |
Hi This weekend I hope to join the front and back plates and fit the rosette. I hope that someone with experience of LMI solid rosettes can help me out a bit. The rosette is a bit over 2 mm thick (0.1" I guess). I presume that I will need to thin this down. Is it best to do this before or after installing it in the soundboard ? I was thinking that I should rout the trench about 1mm deep then fit the oversize rosette and purfling then scrape it down to thickness once installed. Is this correct or should I thin it down a bit first to minimise the risk of damaging the top ? Also is it best to glue the purfling to the rosette before installing it or fit them all together loose (if you see what I mean) Any tips greatly apreciated cos I'm pretty concerned about messing this up ! Sorry if this has been covered before. |
|
| Author: | crazymanmichael [ Fri Dec 15, 2006 4:26 am ] |
| Post subject: | |
install then scrape. i don't know what glue you plan on using but it is most common to fit all the rosette elements into the slot which has glue applied if using hhg or titebond, and to apply ca after fitting the element into the slot. if adding shell, use a teflon strip to hold the shell space, and fit he shell in after. remember to seal your slot and top with shellac to prevent any leaching of colour or ca into your spruce. |
|
| Author: | Michael Dale Payne [ Fri Dec 15, 2006 4:44 am ] |
| Post subject: | |
1MM is prety thin I inlay a .063". This will give you less to scrape flush |
|
| Author: | Brock Poling [ Fri Dec 15, 2006 8:40 am ] |
| Post subject: | |
Presuming your soundboard is full thickness. Join it. Level it on both sides, but leave it thick. Install the rosette. Install it deep, but just leave it a little proud of the top. When done level it from the top. Then flip the soundbaord over and thickness it from the back. That way you will have a lot of rosette material and not have to worry about sanding through. |
|
| Author: | Colin S [ Fri Dec 15, 2006 9:53 am ] |
| Post subject: | |
My rosettes are usually made from the cut ends of the sides, (I like the rosette to match the sides) so they are usually 2mm (.080") or so thick. I inlay to 1.2mm and scrape off the rest. When I rout for the rosette I just rout for the width of the main inlay, Then when its glued in place I rout for the purfling on the inside and outside and fit that separately, I find that I get a tighter fit that way. I glue mine with HHG or sometimes (when lazy) LMI white. Make sure to give the top a wash coat of shellac where you are going to rout the channel, this can help to prevent tearout and a fuzzy edge, then apply more shellac in the routed channel, before gluing the rosette in place. Colin |
|
| Author: | Richard_N [ Mon Dec 18, 2006 4:41 am ] |
| Post subject: | |
Thanks for the advice guys it helped a lot. Went quicker and smoother than I expected and I'm pleased with the result. (I apologise for the bad picture quality believe me it looks OK !) |
|
| Author: | Colin S [ Mon Dec 18, 2006 5:01 am ] |
| Post subject: | |
Looks fine to me, that's another process ticked off on the skills list! Colin |
|
| Page 1 of 1 | All times are UTC - 5 hours |
| Powered by phpBB® Forum Software © phpBB Group http://www.phpbb.com/ |
|